
Are you looking for a simple, yet effective approach for introducing the letter h to preschoolers and kindergarteners?
If so, I have an easy and engaging process that I’m excited to share with you!
While the letter h is not one of the first letters I’d introduce (since it is not as common as the letters s, a, or t for example), it still shows up in many important words for beginning readers such as had, has, him, and his.
No matter where the letter h shows up in the sequence you’re using, you can follow the process below to ensure your students master the letter and sound in a quick, effective, and fun way.
For many years I would introduce the letter h like this:
“This is the letter h (showing the printed letter). H says /h/, as in horse (showing a picture of a horse). Repeat after me, H, horse, /h/”.
After years of studying best practices in literacy instruction, I now use a different approach that’s been giving my students faster success!
Here’s what I do and why I do it. I hope you’ll come away with some inspiration that you can easily put to use tomorrow!
Routine for Introducing the Letter H and Its Sound
You can watch this video to get an idea of the entire routine. You can also play it for your class!
Step 1: Start with speech.
Why?
Making the simple switch to introducing the SOUND first, and then the letter, aligns with how our brains naturally work. Humans are wired for speaking, not reading. Beginning a lesson by asking my students to repeat words orally, and pairing each word with a picture of something that they’re likely to be interested in (like horses and hamburgers), increases their attention and sets them up for success in learning the associated letter (later on in Step 3).

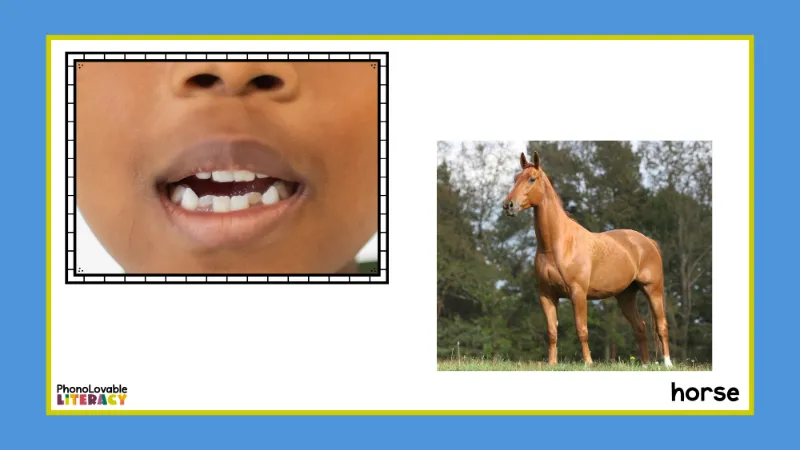
Say 3-6 words that begin with the letter h and its sound, such as hamburger, hens, honey, hat, house, and horse. Ask children to repeat each word after you say it. Displaying an image of each word adds interest and can be especially beneficial for students with limited English vocabulary and kids who struggle with attention. Tell students that all of these words begin with the sound /h/. Ask them to repeat the sound.
Step 2: Draw attention to what your mouth does when you make the /h/ sound.
Why?
Calling attention to how our mouths feel and look when we make the sound, while showing them a mirror as they make the sound or a photo of a child making the sound, gives kids a concrete representation of an abstract concept. Letters are arbitrary symbols. We need to explicitly teach students the sounds and the letters that represent them.
How?
Ask your children to notice what their mouths are doing to make the sound /h/. If you’re in small group, hold up a little mirror to let students watch themselves as they make the sound. Draw attention to the fact that their mouths open, their tongues are at rest, and they breathe out air. I ask my students to put a hand in front of their mouth to feel the air come out. Hold up a “mouth pic”/sound articulation card for students to notice how this looks.
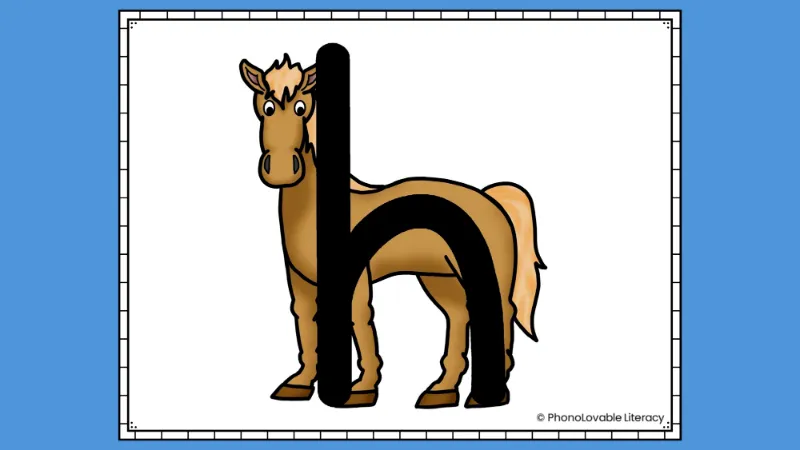
Step 3: Introduce the printed letter with an EMBEDDED mnemonic.
Why?
Having a picture of a keyword embedded within the letter itself has been shown to be a more effective and efficient way for students to acquire and retain letter-sound knowledge, as opposed to a picture or keyword presented beside, above, or below the letter. Once I started using embedded mnemonics to introduce letter sounds, I’ve never gone back to the old way, and I don’t think I ever will. My students pick up letter-sound relationships much more quickly this way. Using embedded pictures, especially ones relatable to kids, just makes so much sense. And the fact that it’s been supported by research going back decades makes it even better!
How?
Now is the time to reveal the printed letter. But not just a plain letter, an embedded letter. A picture of a keyword such as horse or house embedded in the letter h strengthens the connection between sound and letter. The shape of the horse, corresponding to the shape of the lowercase letter h, serves as a cue for the phoneme-grapheme correspondence.
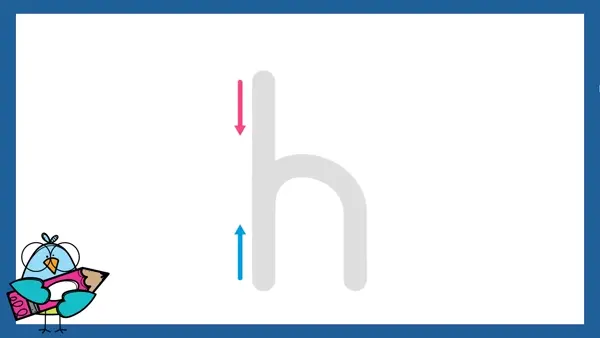
Model and practice how to write the letter.
Why?
Reading and writing go hand in hand. We teach letter sounds so that students may not only read new words, but learn to write them as well. As an interventionist specialist who works with students from kindergarten to 4th grade, I see how hard it is to undo inefficient letter formation habits. For the past few years, I’ve made it a point to prioritize letter formation as early as possible.
How?
I prefer to keep my letter formation language simple. You might have different wording from a program you’ve used, so feel free to adjust how you say this, but here’s what I say as I model how to write the lowercase letter h.
“Start at the top. Straight line down. Push up to make one hump.” I model with my hand in the air and/or show an animated slide on my computer (in small group) or smart TV (in whole group). Ask students to try to follow along with their fingers in the air. If children are seated at desks, I ask them to finger-write it on the desk.
If you are tutoring or have one-on-one instruction, you can also do this in a tray of sand or (less messy) beads. Shaving cream is also an option if you have a thick towel nearby to clean up the mess. None of those options are necessary though. Sky or desk writing is plenty effective.
I usually have students practice without a writing utensil at least a few times before I ask them to write with a dry-erase marker or pencil. This is just so I can make sure they’ve got the movements down before they put it on paper.
Research-Aligned Alphabet Resources
If you need easy-to-use resources to implement the steps above, here are my recommendations:
Initial Sound Slides: These no-prep slides introduce each letter sound in the most effective and efficient way. Start with images of interesting photographs containing the beginning sound. Show a photo of a real kid making the sound along with a keyword image. Show the letter with an embedded mnemonic image. Then show the animated letter formation (in uppercase and lowercase plain letters).
Mnemonic Alphabet Articulation Mouth Cards | Alphabet Posters with Real Pictures: These are printable, 1-page posters to show if you prefer a paper option or don’t have access to digital resources. It’s also a nice way to display the alphabet if you have classroom wall space.
Alphabet Picture Cards with Embedded Mnemonics: This set of printable pages comes with embedded letter cards in two sizes. Teach phonemes for 21 consonants, 5 short vowels, AND consonant digraphs WH, TH, SH, CH, and CK.
Get a free set of small embedded letter cards when you join us in our newsletter community!
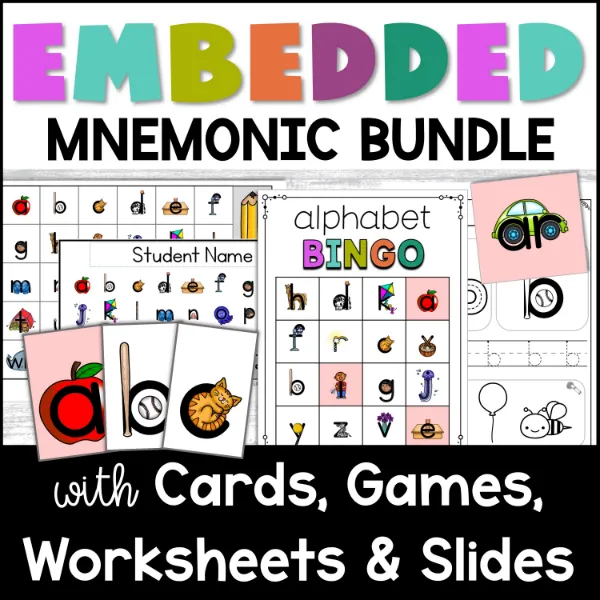
Looking for an “everything bundle” of embedded letter resources, including digital slides, letter cards, worksheets, games, and more? Save nearly 50% and get all 12 resources. Get your students quickly and effectively mastering letter sounds so they can begin the even more exciting discovery of how to read and write words!
Sources:
Ehri, L. C., Deffner, N. D., & Wilce, L. S. (1984). Pictorial mnemonics for phonics. Journal of Educational Psychology, 76(5), 880–893. https://doi.org/10.1037/0022-0663.76.5.880
Ehri, L. C. (2013). Orthographic Mapping in the Acquisition of Sight Word Reading, Spelling Memory, and Vocabulary Learning. Scientific Studies of Reading, 18(1), 5–21. https://doi.org/10.1080/10888438.2013.819356
Ehri, L.C. (2022). What Teachers Need to Know and Do to Teach Letter–Sounds, Phonemic Awareness, Word Reading, and Phonics. The Reading Teacher, 76(1), 53-61. https://doi.org/10.1002/trtr.2095
McNamara, G. (2012). The effectiveness of embedded picture mnemonic alphabet cards on letter recognition and letter sound knowledge. Theses and Dissertations. 302. https://rdw.rowan.edu/etd/302
Shmidman, A., & Ehri, L. (2010). Embedded Picture Mnemonics to Learn Letters. Scientific Studies of Reading, 14(2), 159–182. https://doi.org/10.1080/10888430903117492